Blooming Gel: the watercolour effect on your nails
In this article
Blooming Gel is probably the most relaxed way to create artistic-looking nails: you place just a few drops of colour and the gel does the rest by letting the colour spread out gently. The result is soft watercolour gradients, ink-like wisps and marbled patterns, all without needing a steady artist’s hand. In this guide you will learn exactly what Blooming Gel is, how the effect happens, what you need and how to create different looks yourself, step by step.
What is Blooming Gel?
Blooming Gel (also called “Blossom Gel” or “Watercolour Gel”) is a special, clear gel with no colour of its own. Its special trait: when you apply thinned gel colour or pigment on top, that colour spreads out by itself and bleeds into soft, transparent wisps.
- Transparent base: Unlike a coloured gel, Blooming Gel itself stays invisible – it is only the “stage” on which the colour dances.
- Bleeding built in: Its consistency lets added colour wander outward instead of holding it in place.
- Versatile: It produces watercolour flowers, smoke wisps, tie-dye and marble – looks that would be far harder to paint freehand.
- On trend: The soft, painterly style suits current nail trends perfectly and looks elegant rather than busy.
So unlike classic painted-on nail art for beginners, the pattern is not created by your brushstroke but by the colour bleeding within the gel itself.
How does the blooming effect work?
The secret lies in the interplay between gel and thinned colour.
- You apply a thin, even layer of clear Blooming Gel to the nail – do not cure it yet.
- You place a small drop or a fine line of gel colour on top.
- The colour “blooms” instantly: it spreads around the point of application and becomes lighter and more transparent toward the edges.
- Several colours flow into one another and create soft transitions, like watercolour on wet paper.
- Under UV/LED light you cure the result and lock the gradient in permanently.
The more fluid and less pigmented the colour, the more it spreads. Very opaque gel colours, by contrast, barely spread out – which is why you thin the colour or work with watercolour inks made for nails.
What you need for Blooming Gel nails
- Blooming Gel: The clear specialty gel, the heart of the technique.
- Gel colours or watercolour inks: Two to three shades are enough for a beautiful gradient; easily thinned colours work best.
- Base and top coat gel for adhesion and protection.
- Fine brush or dotting tool to place the drops of colour and spread them gently.
- UV/LED lamp for curing.
- A clean, prepared nail base – ideally on a light background so the watercolour effect glows.
Step-by-step guide
- Prep: File the nails, push back the cuticle, matte the surface and degrease.
- Base and ground colour: Apply base gel and cure. For lots of luminosity, apply a white or light ground layer and cure.
- Apply Blooming Gel: Apply a thin, even layer of clear Blooming Gel – do not cure.
- Place the colour: Immediately set small drops or fine lines of gel colour into the Blooming Gel. Work quickly while the gel is fresh.
- Let it bleed: The colour blooms by itself. If needed, gently nudge or drag it with the brush tip to guide the shape – do not stir it.
- Cure: Once you like the gradient, place it under the lamp – this locks in the effect.
- Seal: Apply top coat and cure. This adds shine and protects the watercolour pattern.
Effects and variations at a glance
One and the same Blooming Gel produces very different looks – depending on how you place the colour:
- Watercolour flowers: Set drops of colour in a flower shape and let them gently spread – with a dot in the centre you get a floral effect.
- Smoke: A single dark line that bleeds outward gives delicate smoke wisps on a light ground.
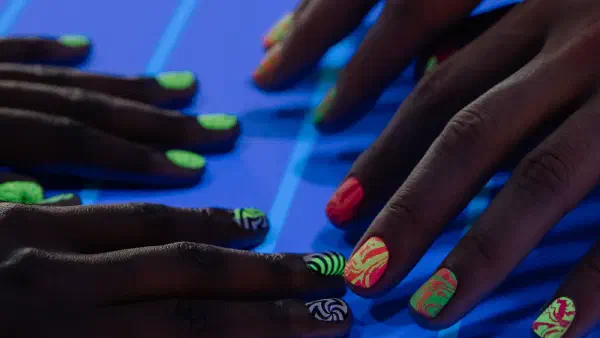
- Tie-dye: Place several bold colours side by side and let them bloom into one another – colourful and playful.
- Marble: Let two or three related shades (such as grey, white, a touch of gold) bleed for an elegant marble look.
- Galaxy: A dark ground with blue, violet and white drops creates a starry-sky gradient.
Tip: decide on the look before you start and keep the colour palette per hand cohesive. As a subtle variation, a single watercolour accent nail next to plain shades is enough. If you like to experiment, the overview of nail trends 2026 offers more ideas for modern gradient designs.
Care and durability
As a gel manicure, a Blooming Gel design lasts about as long as other gel nails – usually two to three weeks until the grow-out shows. To keep the soft effect looking good for a long time:
- Refresh the top coat: A fresh top coat after about a week refreshes the shine and protects the surface.
- Oil your nails: Regular cuticle oil keeps the base supple and helps prevent chipping at the edges.
- Gloves for housework: Protects the gel from harsh contact with water and cleaning agents.
Common mistakes and how to avoid them
- Too much colour: If you place drops that are too big or too many, everything runs together into a muddy tone. Use sparingly – you can always add more.
- Worked too late: Once the gel starts to dry, the colour no longer blooms. Place the drops immediately after applying the Blooming Gel.
- Blooming Gel cured: Accidentally curing the clear layer beforehand destroys the bleeding effect completely. Colour first, lamp second.
- Over-stirred: Wild stirring turns the watercolour into a uniform mush. Only nudge gently or let the colour run on its own.
- Colour too opaque: Undiluted, heavily pigmented gel colour barely spreads. Thin it down or use specially soft shades.
Frequently asked questions (FAQ)
How does Blooming Gel differ from normal colour gel?
Normal colour gel stays where you apply it and keeps sharp edges. Blooming Gel is clear and makes the colour placed on top spread by itself – which creates the typical soft watercolour transitions without any brushwork.
Do I need artistic talent for the watercolour effect?
No, and that is the appeal. The gel handles the bleeding for you. You only control where and how much colour you place and when you cure. That makes the technique well suited to beginners – about as accessible as the cat-eye effect with magnetic gel.
Which colours work best?
Easily thinned, fairly transparent gel colours or watercolour inks for nails bleed most beautifully. On a light or white ground the shades glow strongest. Very opaque colours barely spread.
How long do Blooming Gel nails last?
As a gel manicure, the look usually lasts two to three weeks. A good top coat protects the gradient and the shine. After that the nail grows out visibly and the design is redone or refreshed.
Can I combine Blooming Gel with other techniques?
Yes, in moderation. A single watercolour nail next to plain shades looks lovely, or combined with fine lines and a touch of gold. Avoid too many effects on one hand – a single soft eye-catcher looks more refined.
Does the effect also work with normal nail polish?
The classic blooming effect needs the clear specialty gel and is cured under the lamp. With ordinary nail polish you cannot reliably create the soft gradient, because the colour does not bloom in the same way.